inkscape fundamentals
inkscape fundamentals
three D button with eyes
Fundamentals are everything, here you get it all, a simple button example will teach you how to set up your document using preferences and getting ready with guides… snapping… layers… shortcut keys to increase your productivity… gradients to shade, and object/path selection, grouping, and performing operations on said paths. Learn these and then expand in other projects!
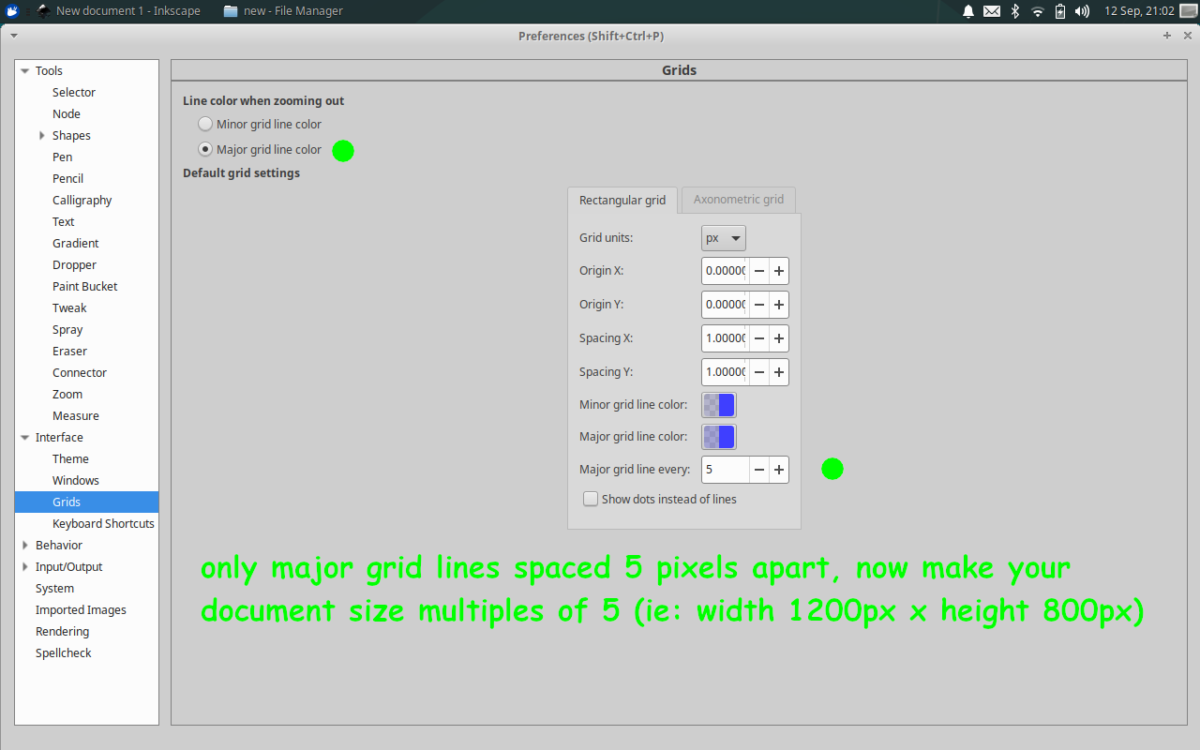
edit->preferences->”Interface”->grids (or key Shift + Ctl + “p”), adjust as desired
View->page grid (or key “#”) [select], also View->guides (or key “|” which is the “vertical bar”) [deselect] this will enable us to align buttons in a 2×2 grid equidistant apart
shortcut keys are high-lighted green,
interface icon are high-lighted orange,
and menu bar commands are high-lighted purple.
If you have completed a list item (numbered) click the list item number, and you can keep your place (a check mark appears next to the list item #, and the background of the list item becomes gray.
-
document preparation
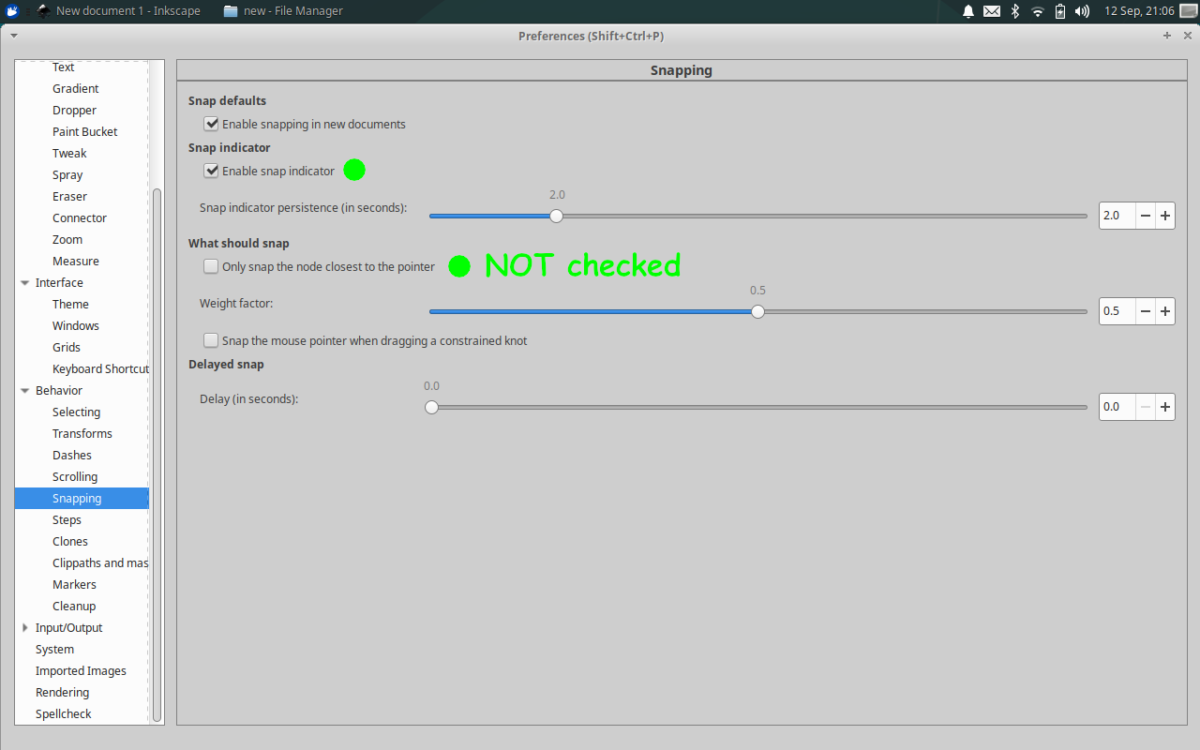
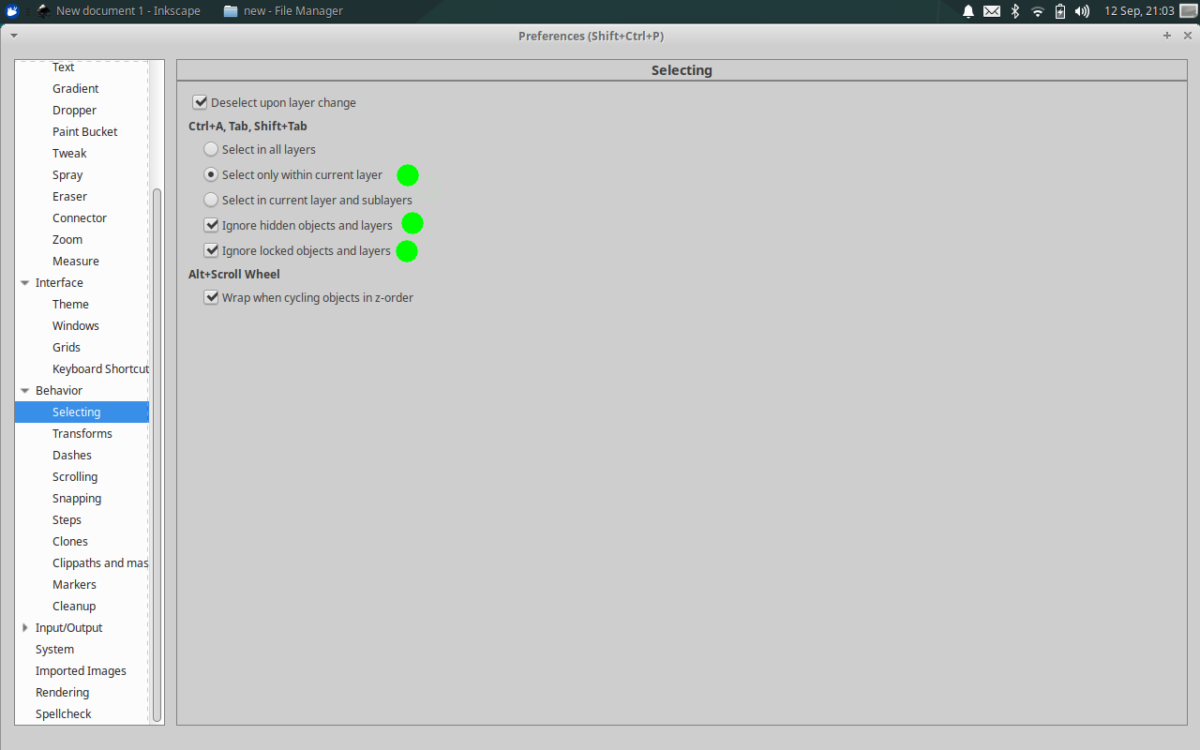
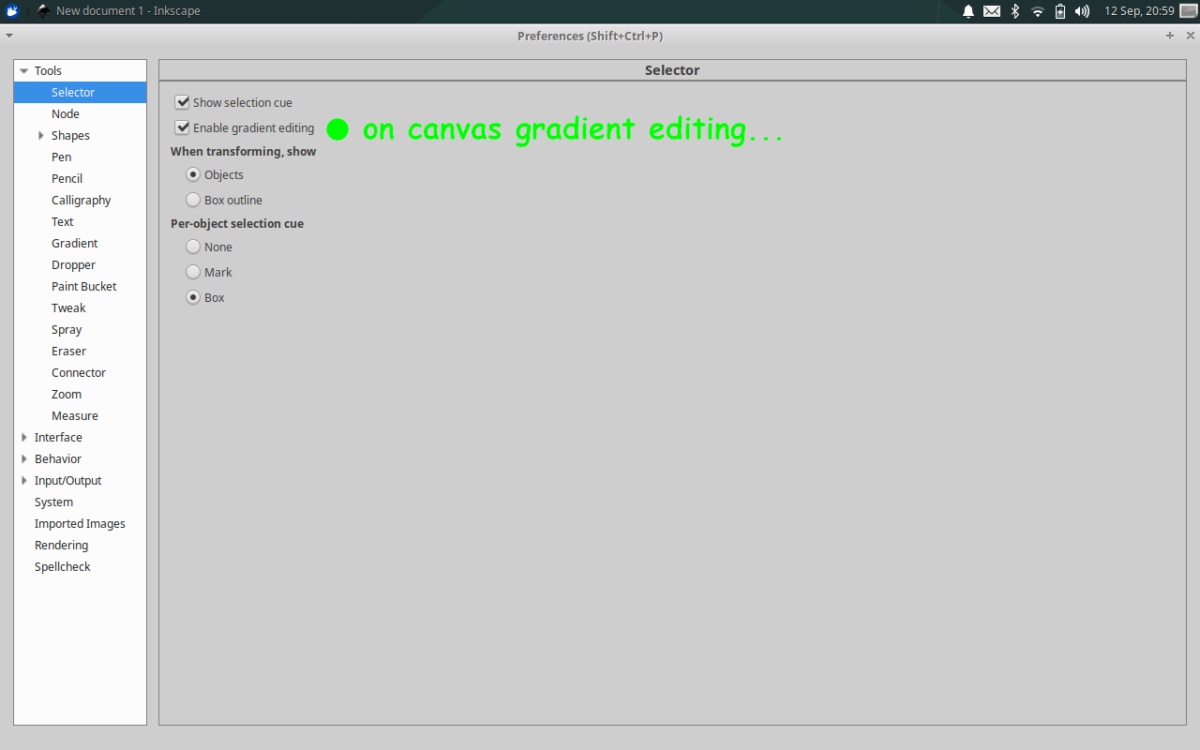
Below are screen shots to help you adjust snapping if needed. There is also a screen shot for adjusting how object selection functions, and finally, a screen shot to enable on canvas gradient editing (note that this is found in two places: edit -> preferences, “tools” – selector, and “tools” – node).
tool icons:
select “enable snapping” button
deselect “snap nodes, paths, handles”
select “snap other points (circles, guide origins, gradients handles etc.)” button
select “snap an items rotation center” (is grayed out until above is selected)
select “snap to grids”
deselect “snap to guides”
check “show page border” file->document properties “border” section (or key (Shift + Ctl + “d”) either way you get there, make sure “show page border” is checked so we can see the outline of the “page” which is different from the “drawing” (which is the entire area including the page that has the borders, and any objects placed outside of it).
Some of the functions of cutting versus copying is that if you “cut” your object it is no longer on the hosting layer, another is you’ve just moved it to the top of the object stack which becomes important for example when you do path operations or how your objects present themselves on a single layer. Some of the functions of copying versus cutting is that if you have essentially left behind a backup object on the hosting layer… Now if we were talking about a different application such as GIMP, cutting may leave you with a “hole” in your page, but in Inkscape, this is not the case…
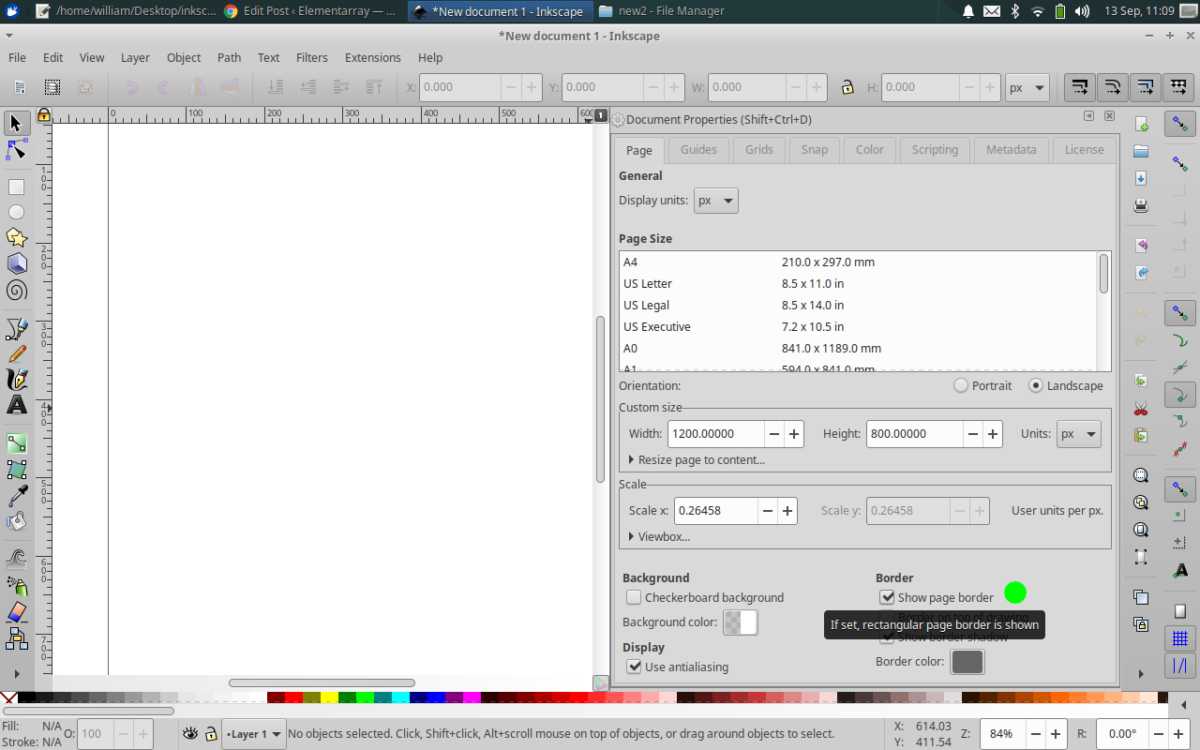
“show page border” file->document properties “border” section (or key (Shift + Ctl + “d”) either way you get there, make sure “show page border” is checked so we can see the outline of the “page” which is different from the “drawing” (which is the entire area including the page that has the borders, and any objects placed outside of it).
Move extra/backup objects off the page to use later you can toggle between “page” view and “drawing” view to find/work these objects View->zoom->drawing (or key “4”), to toggle, View->zoom->page (or key “5”), if you have no objects outside of the page, your drawing area will be any objects within the page… essentially a closeup. view->zoom->page
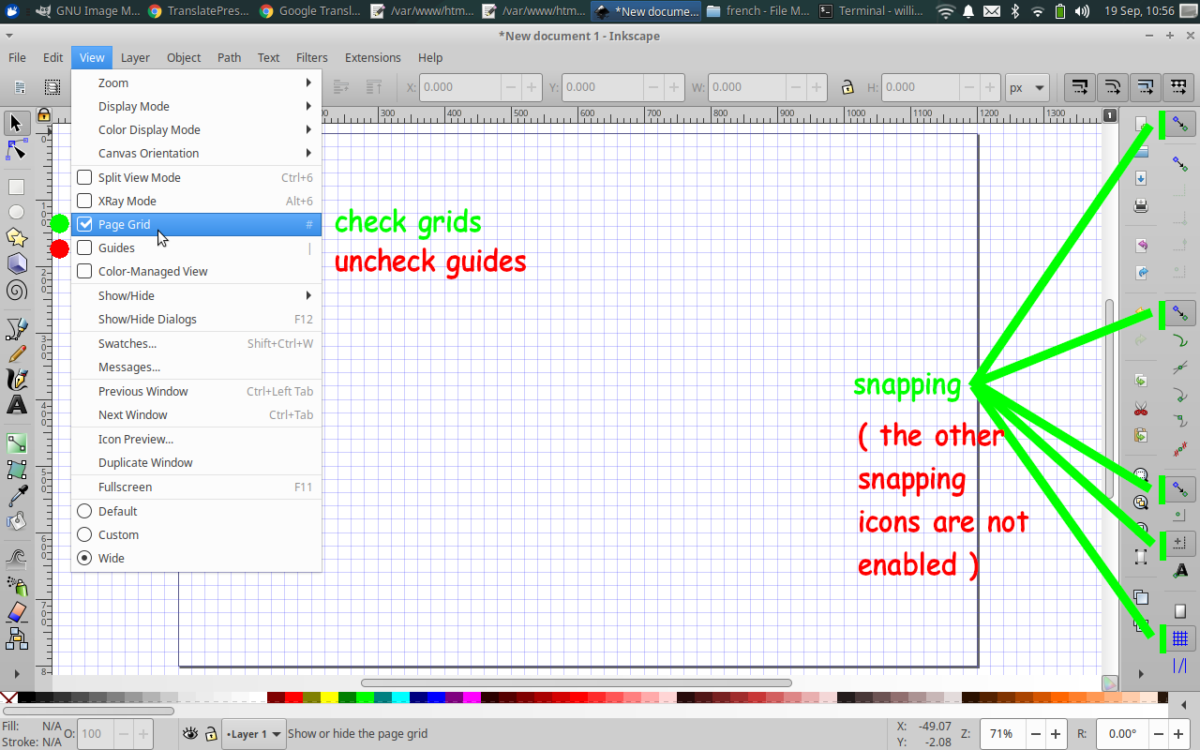 Make certain your grids are enabled View-> check “Page Grid” (uncheck “Guides”), or key “#” ( disable guides ) (or toggle key “|” which is the vertical bar), and you have the correct snapping icons enable (the others should be disabled).
 -
essential keyboard shortcut commands and icons to improve efficiency:
inkscape keyboard shortcuts
“Select and transform objects” tool (or key “s”) & “Edit paths by nodes” tool (or key “n”) are 2 important selection tools that you should be come familiar with and are able to quickly interchange them as needed…Also (Shift + “+”) & (Shift + “-“) are extremely handy for zooming in and out respectively.Also (Ctl + “p”) copy, and (Ctl + “v”) paste, and (Ctl + “x”) cut.
Undo (Ctl + “z”) and Redo (Ctl + Shift + “z”) are vital!
One more thing, while you have something selected, an object, multiple objects, even nodes and gradient handles, you can use your “arrow” keys to make precise adjustments, very very handy, and may save you a meltdown. -
layers
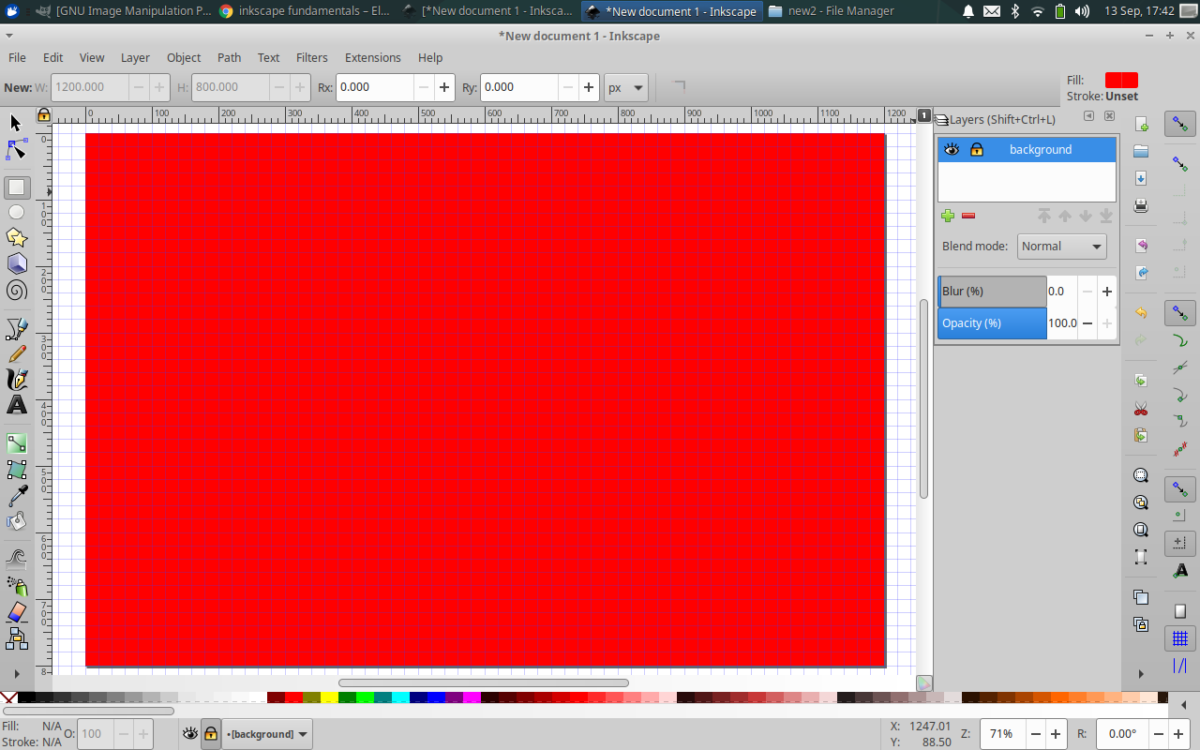
layer->layers (or key Shift + Ctl + “L”)
click on “Layer 1” in the layer window, change name to “background” key enter to retain“create rectangles and squares” tool (or key “r”) click in page border, drag, cover from corner of page to opposite corner.
click “red (#ff0000)” color palette at bottom of window, or Object->Fill and Stroke (or Shift + Ctl + f)Lock “background” layer by selecting lock icon next to background layer in layer window. (this will save you frustration and enable you to select objects copy paste and other actions much more easily) -
creating objects on a new layer
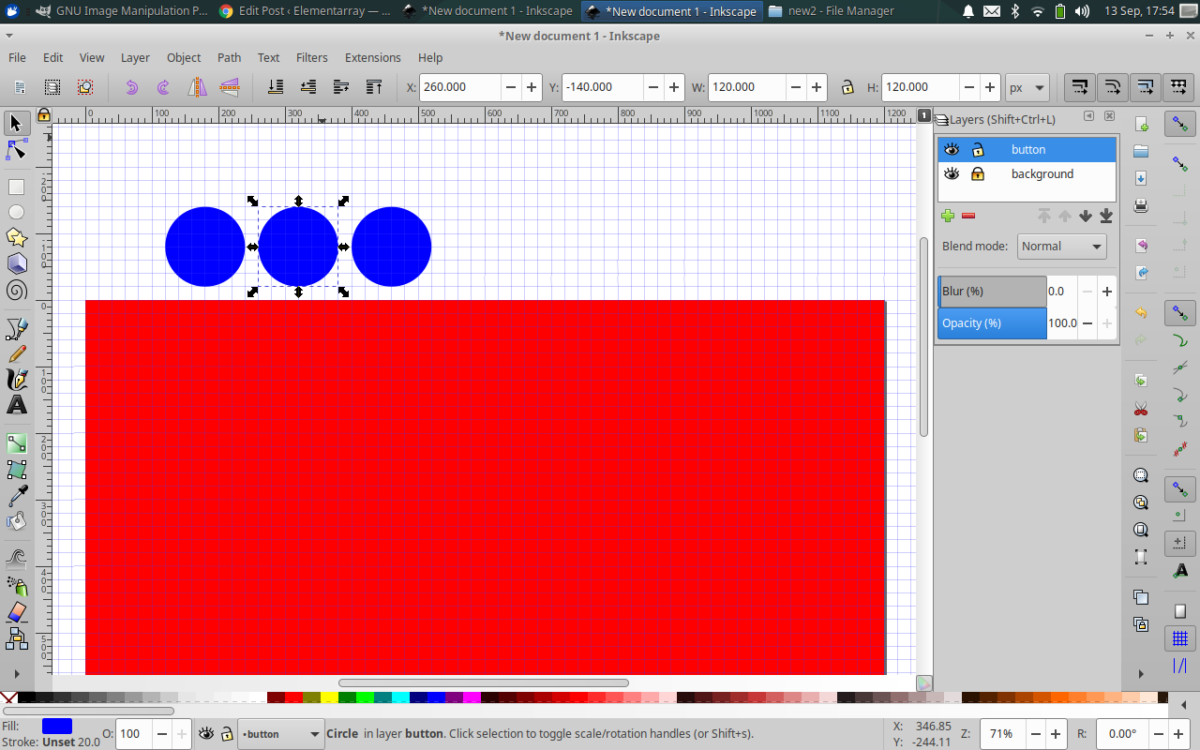 Make sure you select “background” layer, or you won’t get the drop down box option when you: Create new layer “+” in layer window (or “Layer”->add layer)
rename to “button” make sure 2nd box says “above current”, make sure in layer window “button” layer is blue/selected.“create circles, ellipses, and arcs” tool (or key “e”)
Hold Ctl key down to keep circle symetric, while clicking in page and dragging to a desired circumference.
click blue “(#0000ff)” color palette at bottom of window, or Object->Fill and Stroke (or Shift + Ctl + f).click Object->object to path (or Shift + Ctl + c) as we want a path, not an object(the shape tools create objects)
“Edit paths by nodes” tool (or key “n”), circle will show nodes…“Select and transform objects” tool (or “s”) and select “blue circle” , (or key Ctl + “c”) to copy it, remember make sure you are on “button” layer, (or key Ctl + “p”) to paste it, move it off the page we will use it later (if you lose it, go class=”command”>View->zoom->drawing. Do this 2x. without moving circles (you now have 3 blue circles stacked). It is good habit to account for the “z-order” (which object is where in the stack), as of now, the selected circle would be #1, directly underneath it #2, and the original #3. Holding the shift key down key press the right arrow, count the key presses and when you’ve passed the stack of circles edge repeat that number again, until it is far over enough to fit a circle in between (might want to also account for some margins between all objects, add 2 more key presses). Stack Circle #1 is now over to the right. Select the next circle on the stack (#2), hold shift and with the right arrow, press that key until the edge of #2 touches the edge of the stack, then give one more key press, you should be exactly in the middle of the circles with margins in between the circles! Sweet, right? Starting from the left the stack order is 3 (original),2,1, and when your finished, #2 is still selected… perfect. -
creating objects on a new layer, part 2
 Create new layer “+” in layer window (or “Layer”->add layer)
rename to “eyes” make sure 2nd box says “above current”
make sure in layer window “button” layer is blue/selectedclick on a copy of a blue circle, (or key Ctl + “c”) to copy it, select “eyes” layer, (or key Ctl + “p” ) and paste it in that layer.
“Select and transform objects” tool (or key “s”) and select the circle you just pasted. Object->Transform (or Shift + Ctl + m), scale, check “scale proportionately”, drop down menu = %, width 20% (click anywhere else and height will also become 20%), click apply. click on circle, (or key Ctl + “x”) to cut it (we’re not on the “page” we are in the “drawing”, select “eyes” layer (get in the habit of confirming the layer you’re in), (or key Ctl + “p”) to paste it… paste it twice (it’s in memory…). -
select and transform objects
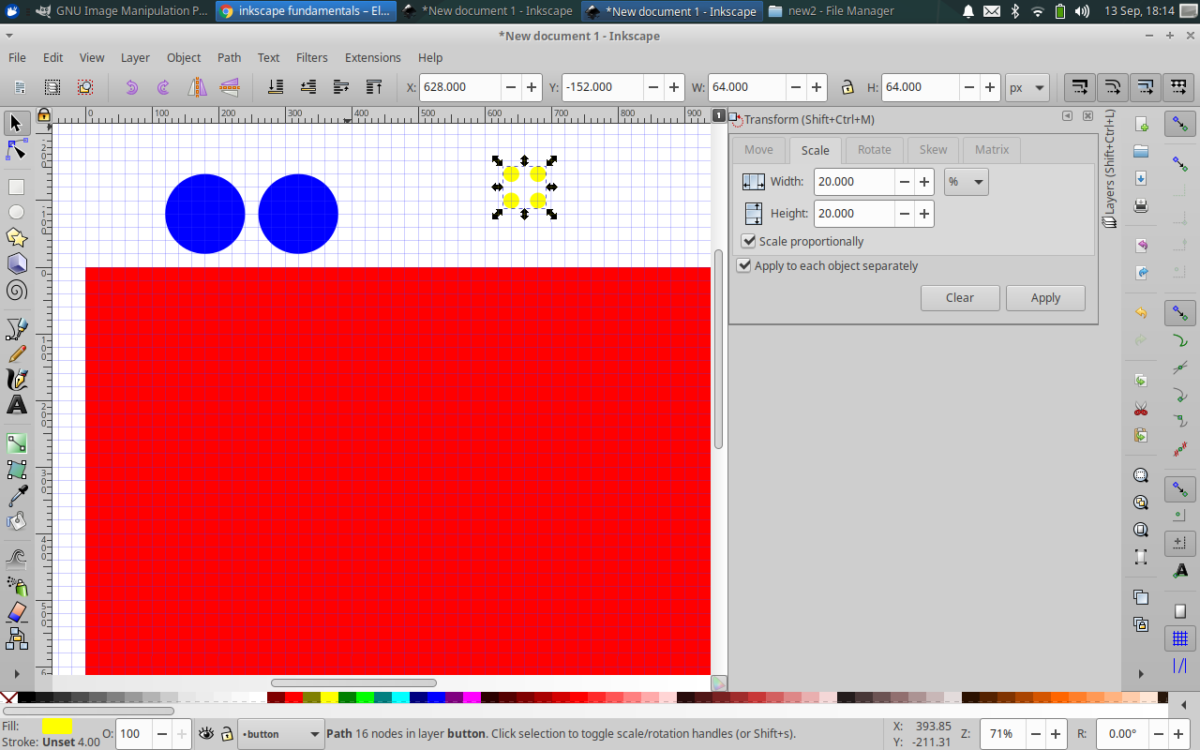
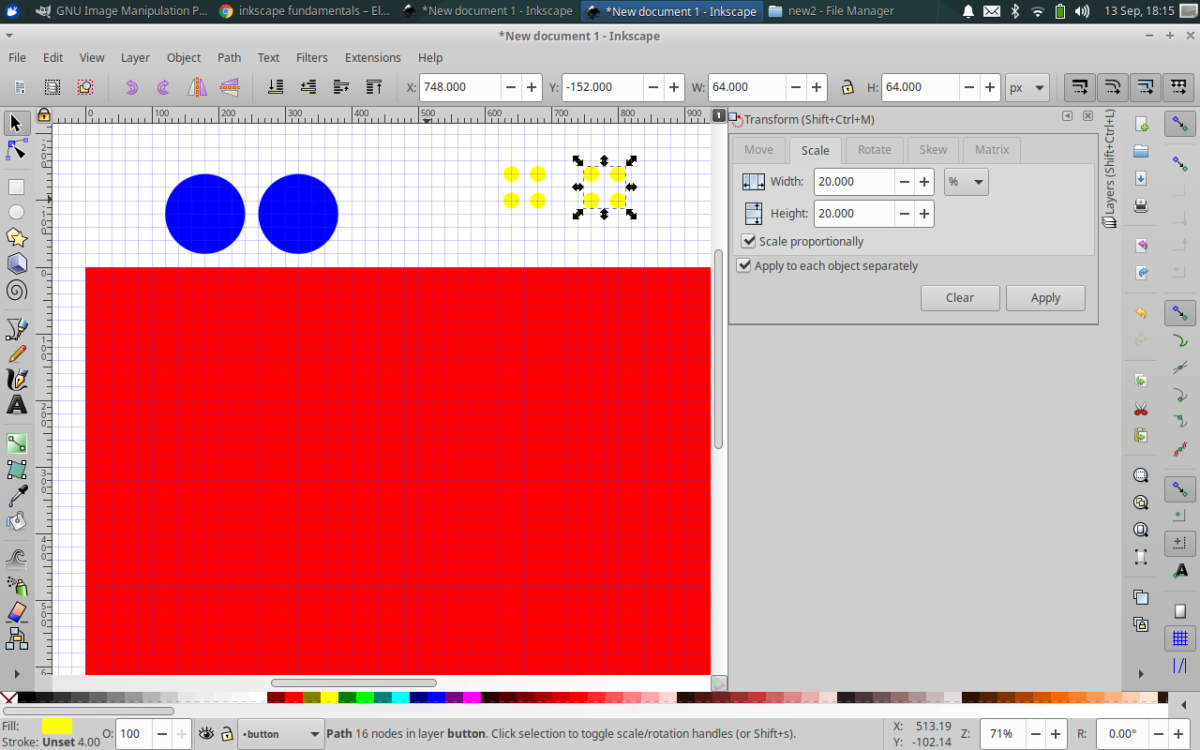 “Select and transform objects” tool (or key “s”) and select circles one at a time, they may be stacked on top of each other no worries. Adjust the 4 circles in a 2 x 2 grid to your satisfaction. The grid snapping will help you make it symetrical.Path->Union (or key Ctl + “+”) this creates 1 “path” out of 4…
“Select and transform objects” tool (or key “s”) and select 4 circle “path”, it should all select as 1, if not, it’s not a single path yet.
click “yellow (#ffff00)” color palette at bottom of window, or Object->Fill and Stroke (or key Shift + Ctl + f), we do this to help us visually identify objects.click on “4 circle path”, (or key Ctl + “x”) to cut it, select “eyes” layer, key (or key Ctl + “p”) to paste it do this 2x, move them off the page we will use them later (if you lose them, go View->zoom->drawing. -
center by snapping and path operations
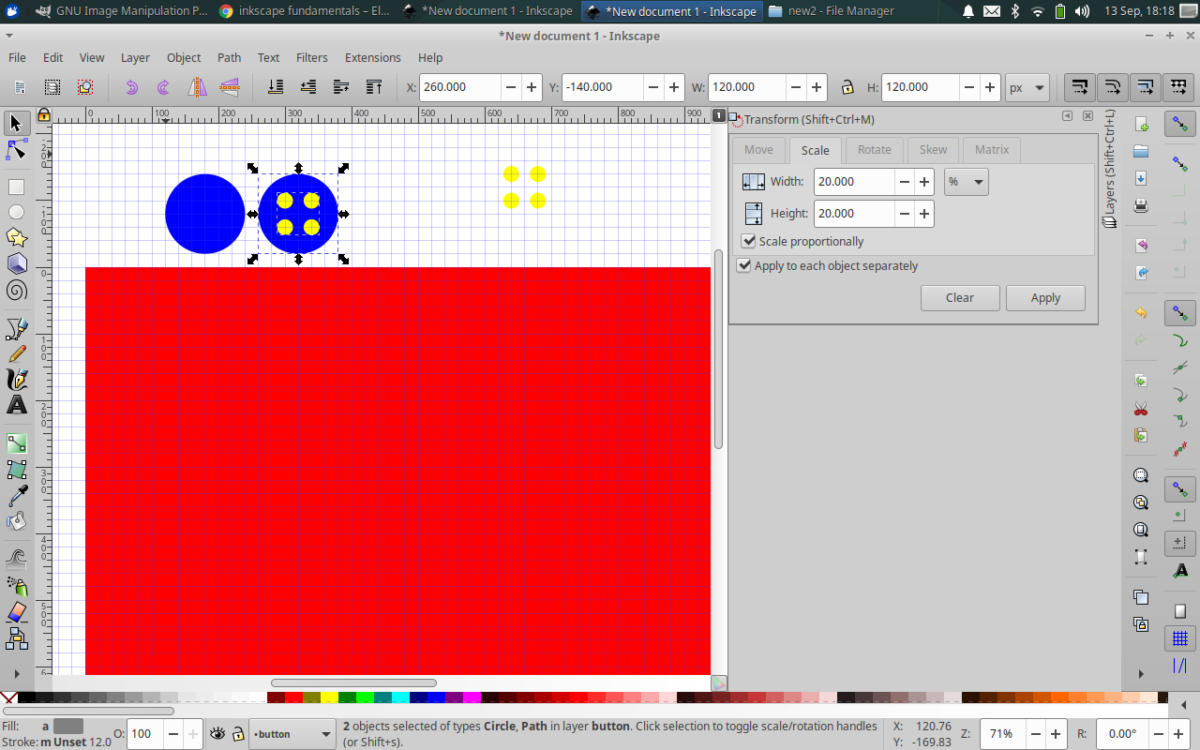
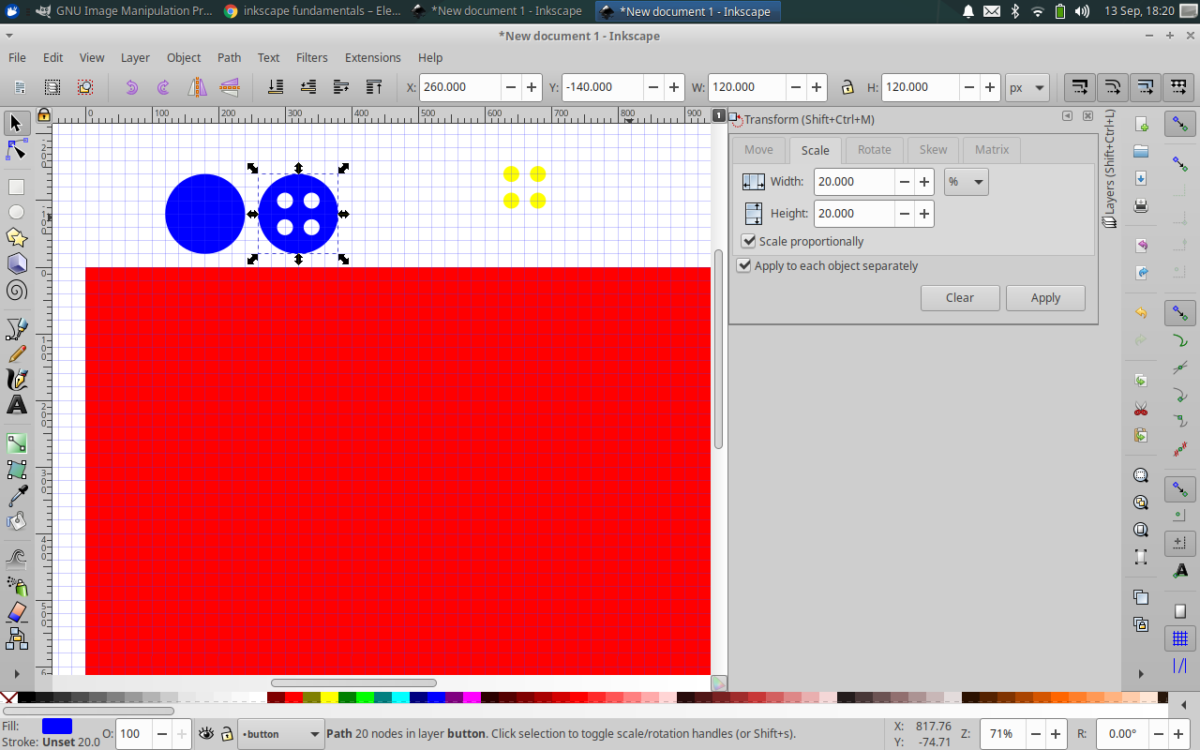
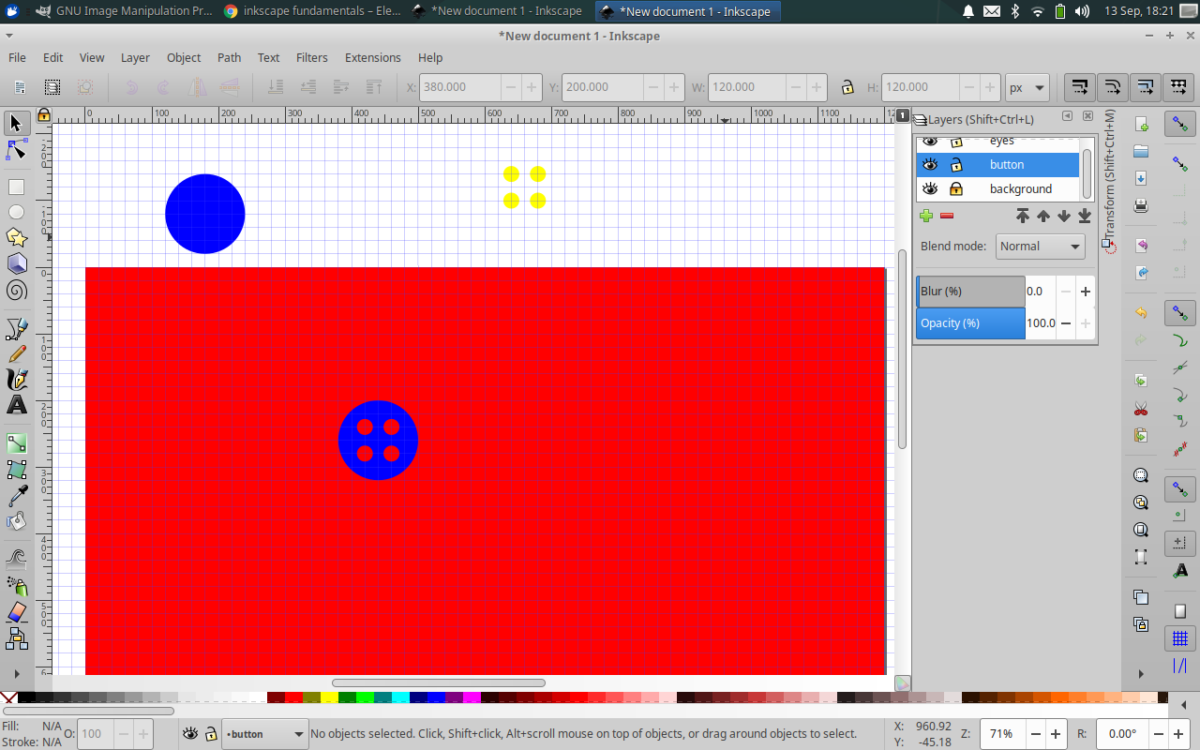 By moving the blue circle it will now center by snapping, this way you can select the “4 circle path” and center it over the blue circle. This way you can do it wherever you want, or alternatively, you can use:
Object->Align and Distribute (or Shift + Ctl + “a”), in “Align” row, make sure “relative to last selected” (or first, depends on the order you selected the blue circle and the yellow path) then click both center horizontally, and center vertically. Select blue circle first (selection order is important when doing path operations), it is easier to select the “bounding box” of the large single blue circle (bounding box – the minimum or smallest bounding or enclosing box for a point set), then the “4 circle path” go to Path->difference (or key Ctl + “-“).
The 4 circles should “appear” to turn red, but you’ve actually cropped that path out of the blue circle and now the red background layer is visible. Learning how to “Union” & “Difference” will be immense in your graphic production! CONGRADULATIONS!!! -
big blue circle, two scaled 80% copies
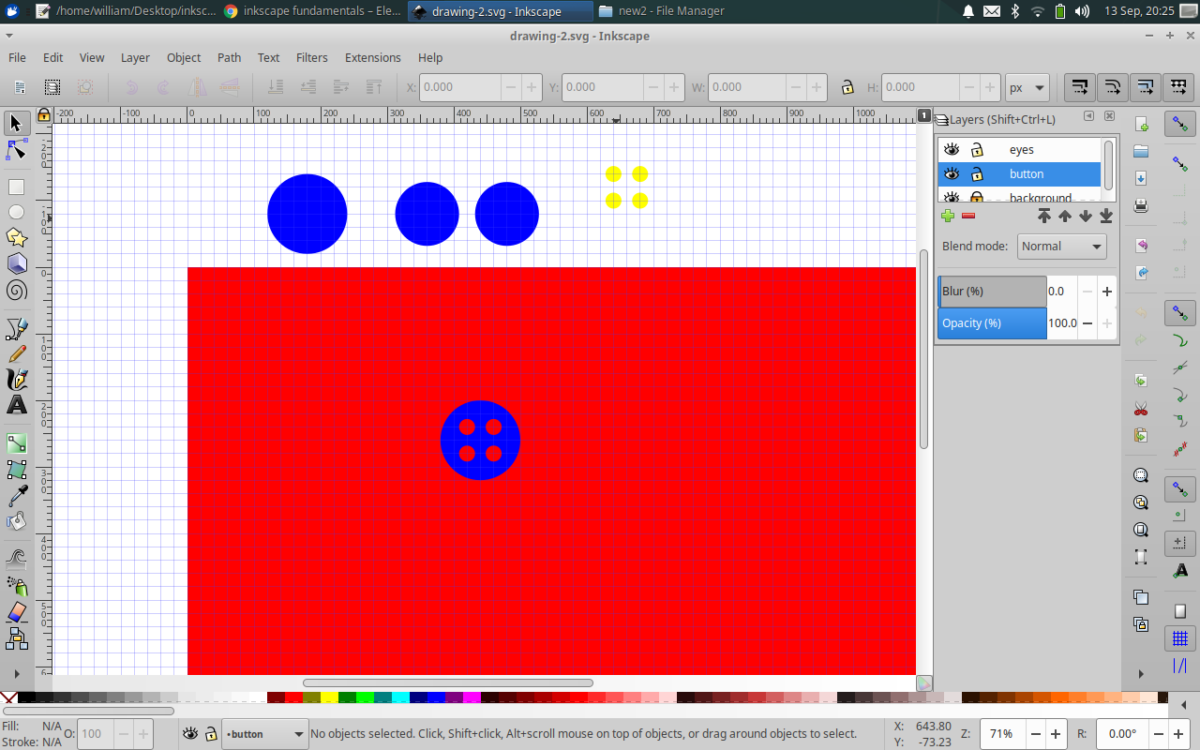 Select the blue circle (scale 100%) on the drawing area (outside the page), copy it, paste it, move it to the right, now transform/scale it 80% Object->Transform (or Shift + Ctl + m), scale, check “scale proportionately”, %, width 80% (click anywhere else and height will also become 80%), apply. click on circle, (or key Ctl + “c”) to copy it, select “button” layer (get in the habit of confirming the layer you’re in), ( or key Ctl + “p”) to paste it.You now have 2 blue circles at 80 percent scale, one will be a cropping circle, one will be cropped and darkened for the 3d effect of the button holes.
 -
gradients
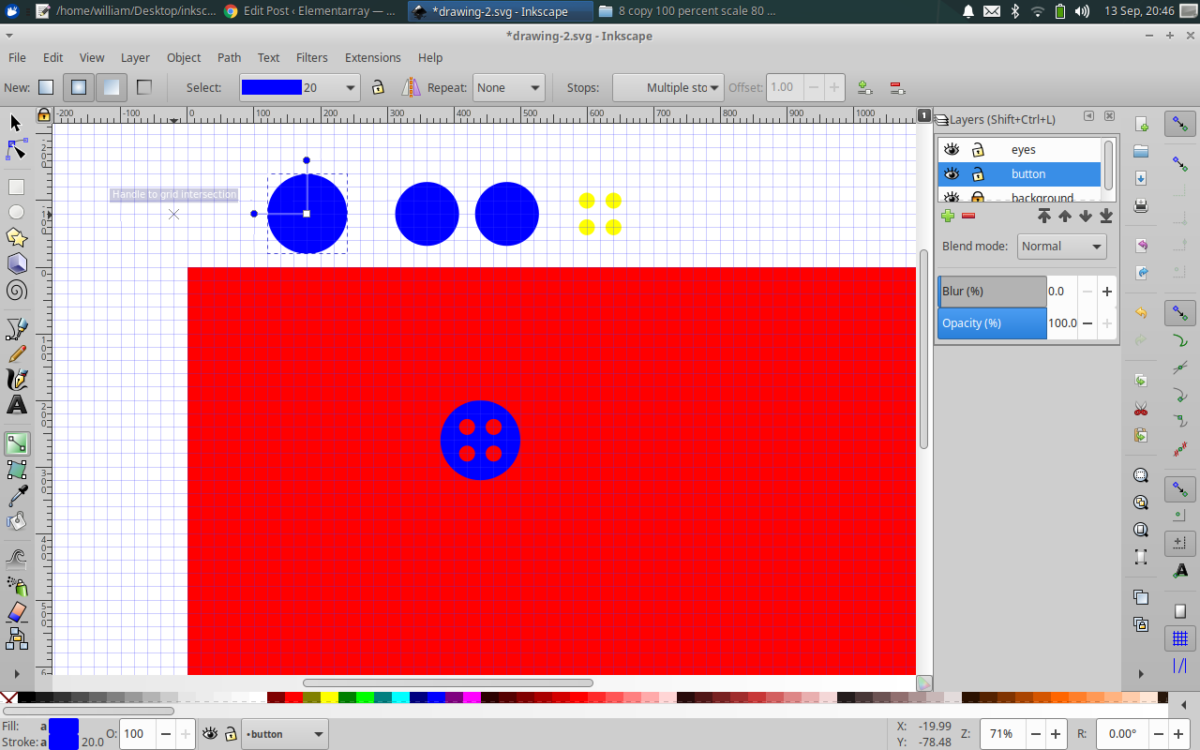
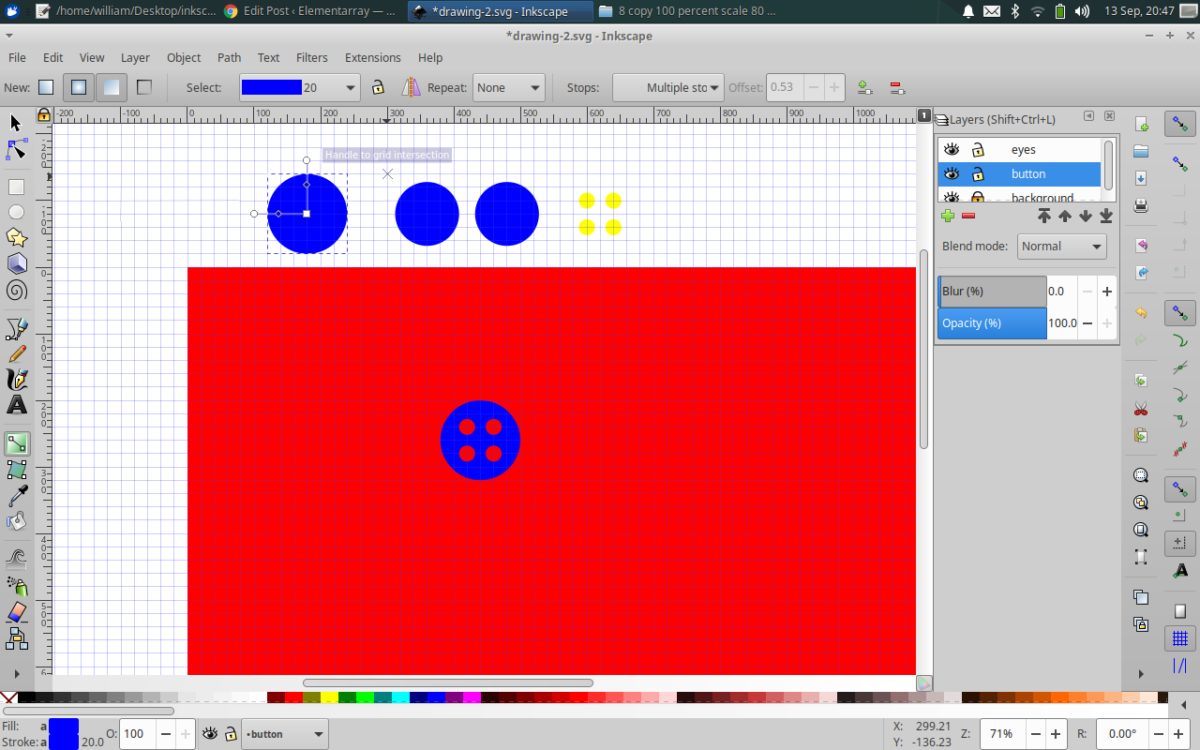
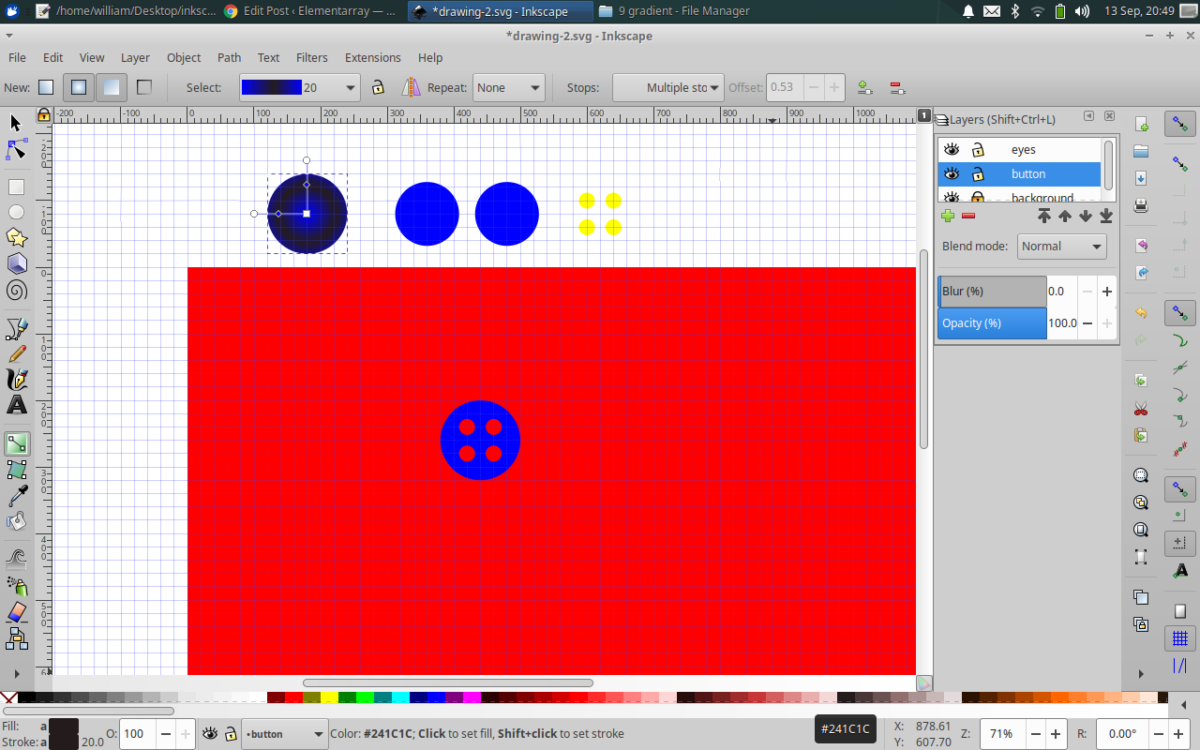
 Select the other “copy” of the blue circle, the one at 100% scale without cropping work done to it. This we will do gradient work to.
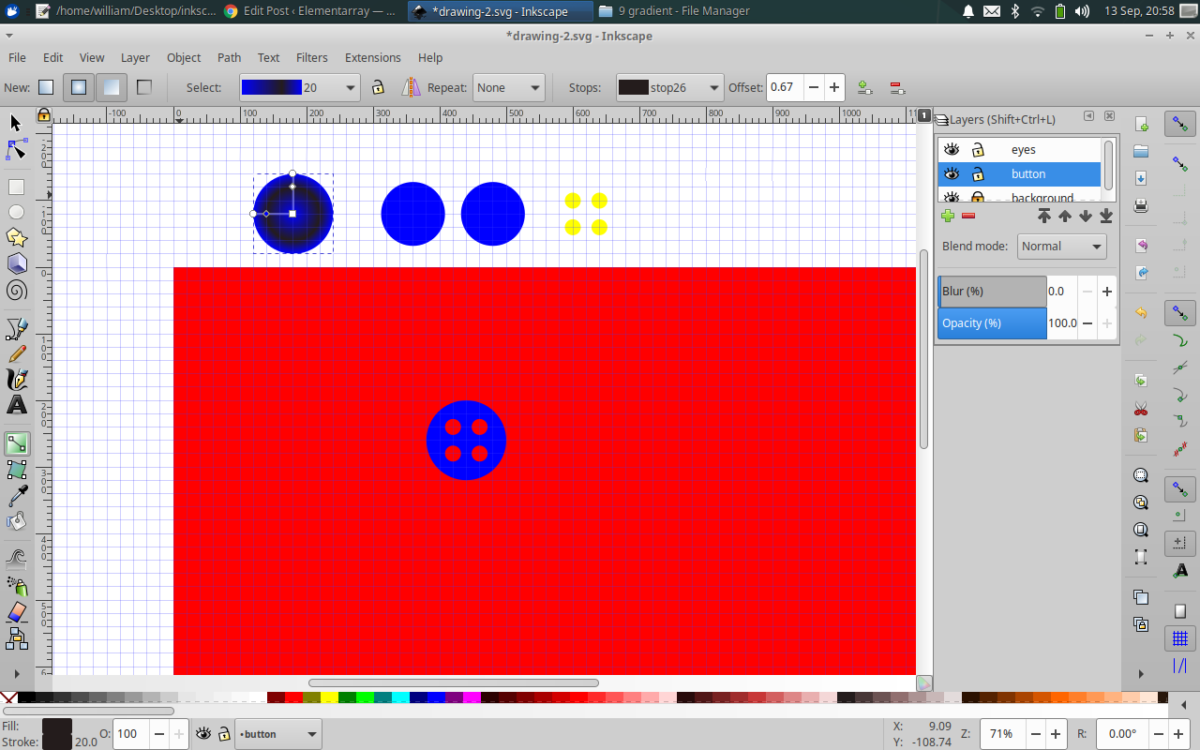
“Create and edit gradients” tool (or key “g”), click in center of circle, drag 1st handle (vertical) up outside of circle, then drag 2nd handle (horizontal) across so they are relatively same length/width from the center. Hold the shift key down and select both gradient nodes then click blue (#0000ff) in color palette at bottom of window. With the gradient bars still visible, with “Create and edit gradients” tool, double click on the gradient bar, just below the edge of the circle, this is adding an additional “stop”. You can verify and do more things if you open up the Object->Fill and Stroke window and select the “radial gradient” icon in that window. The effect we are looking for should be the edge of the circle is blue quickly blends to black, this is made possible by the addition of the 2nd “stop”. In order to change the color of a gradient, you change the color of the “stop”. Click on the stop (you can use the gradient tool still) this will select it, hold down shift key and click on it’s partner stop node (there are 2 gradient handles, vertical and horizontal, select by holding down the shift key a node on the horizontal axis, and it’s sibling node on the vertical axis) then use the color palette at the bottom of the window to change the color. You can also (still using the gradient tool…) click and drag the stop to adjust how the gradient performs. Or, you can select the gradient node and move it using the arrow key(but with arrow key you can only have 1 node selected, not both, if you have both outer nodes selected, the first stop, using the arrow key will rotate). Keep in mind, moving the first (outer edge) stop will move the second (middle) stop on the handle, so adjust the second (middle) stop lastly.
Select a color from the color palette at the bottom of the window, as you can see from the screen shot, I chose #241C1C, if you want straight black, go all the way to the left of the color palette and you will see a gray scale selection, or choose something else… -
cropping & “z-index”
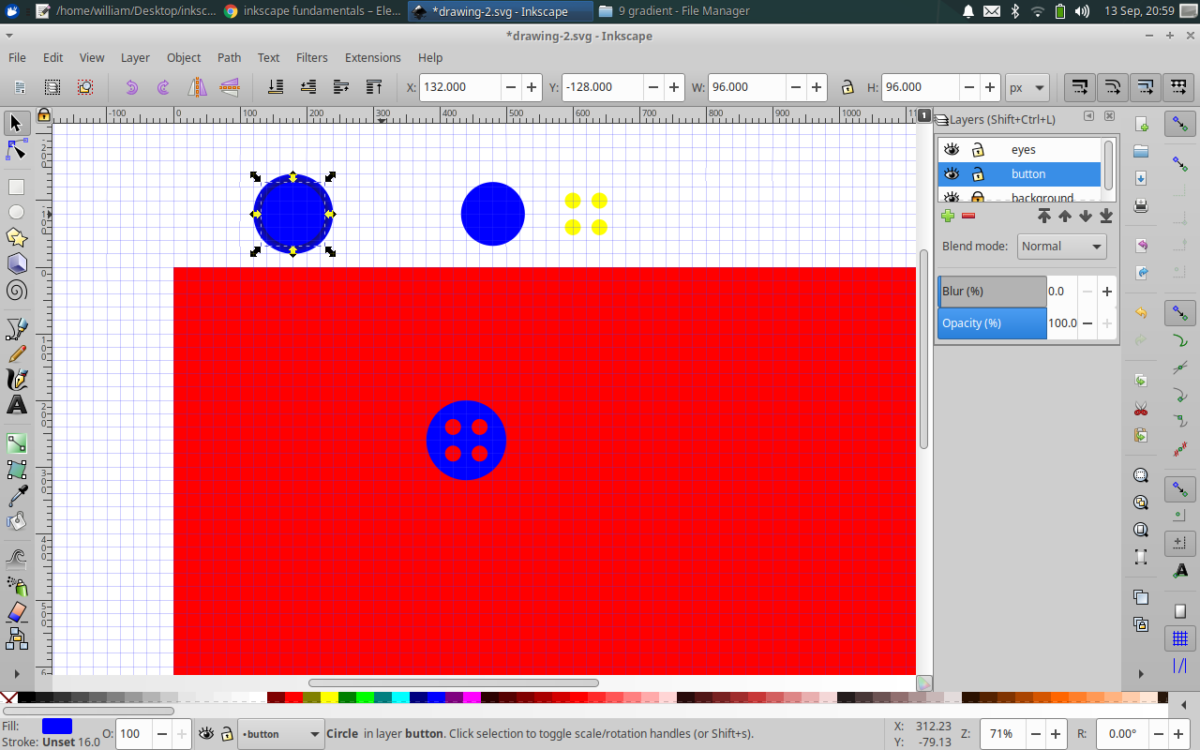

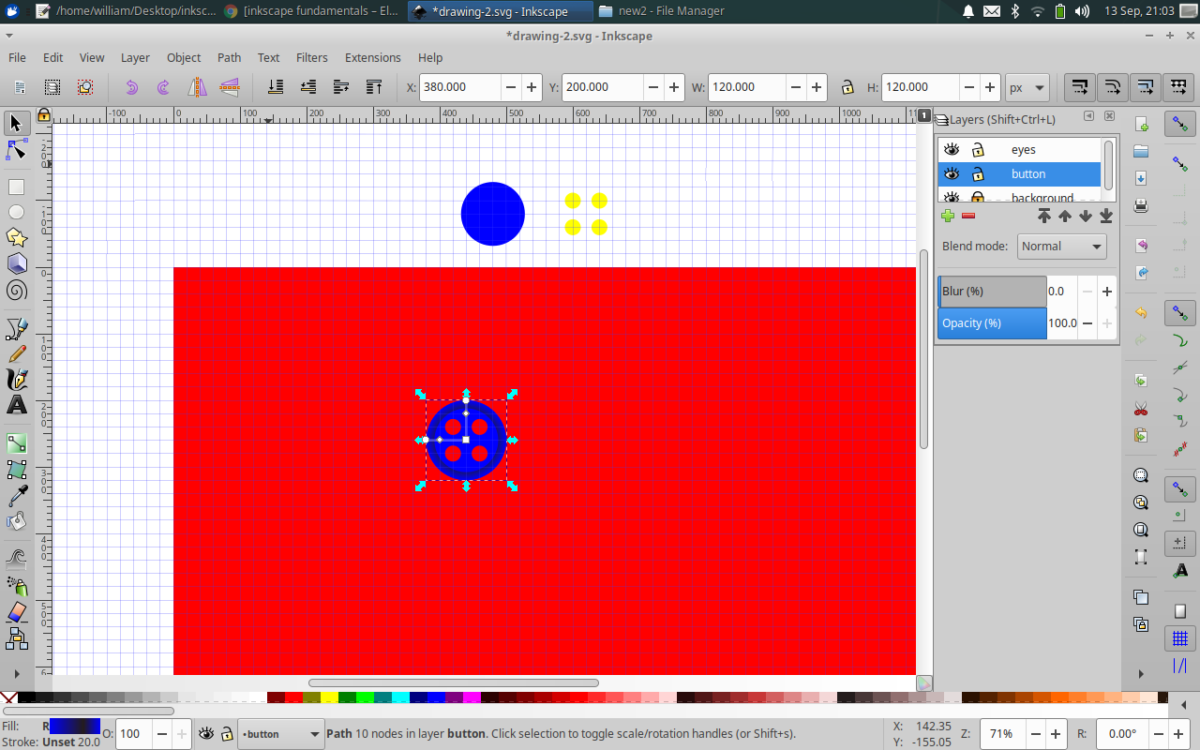 “Select and transform objects” tool (or key “s”) and select blue circle that is 80% scaled. Center it over the blue circle we just applied the gradient to, it should snap right into place. Select the blue circle that is 100% scale (you may have to select it’s “bounding box” which includes the area around the circle if that circle was contained in a tight fitting square…). Hold Shift key down and then select the blue circle that is 80% scaled. Now perform Path->difference (or key Ctl + “-“). Move the cropped circle on top of the button in the page… you might have to cut and paste the cropped circle to change it’s “z-index” so it is higher than the button. You have now successfully made another major jump in digital graphics, using gradients with cropping to emulate shading and 3-d effects! CONGRADULATIONS!!!
 -
eyes of the button, three dimensional emulation
by the way, to save you the heart ache, don’t crop eyes out of a circle that is not scaled to it’s end dimensions, because if you do so, and then scale it, your eye holes scale also…
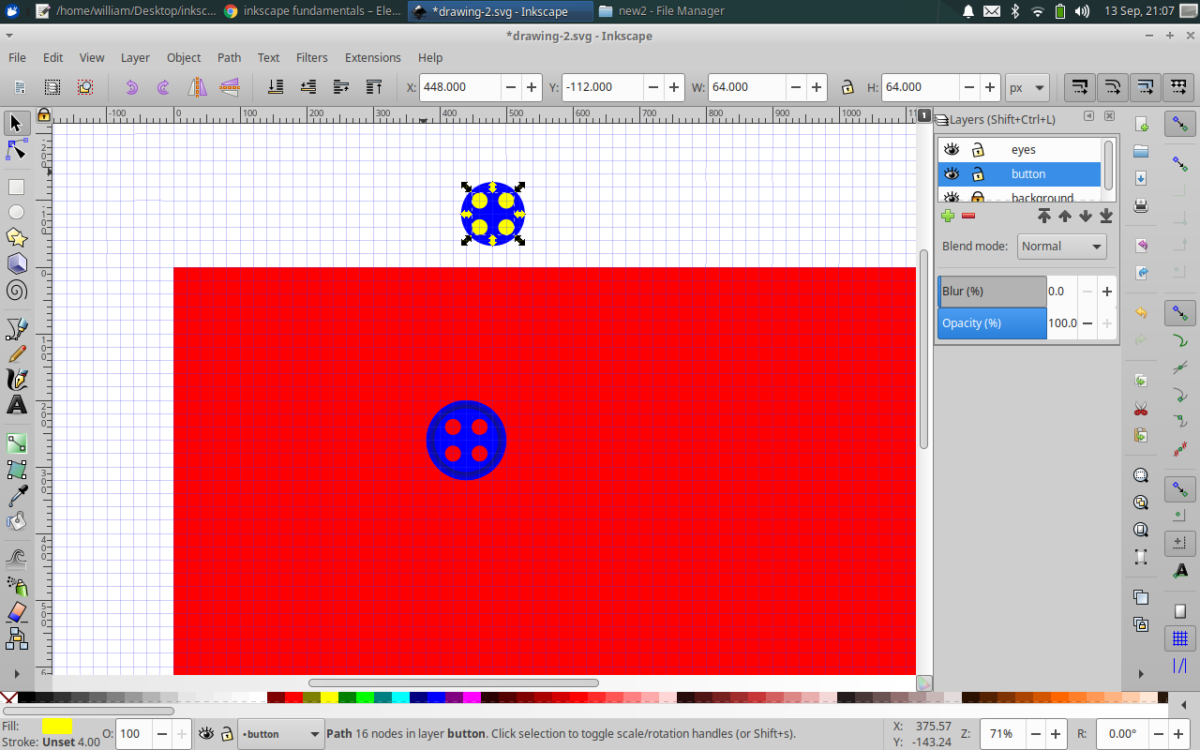
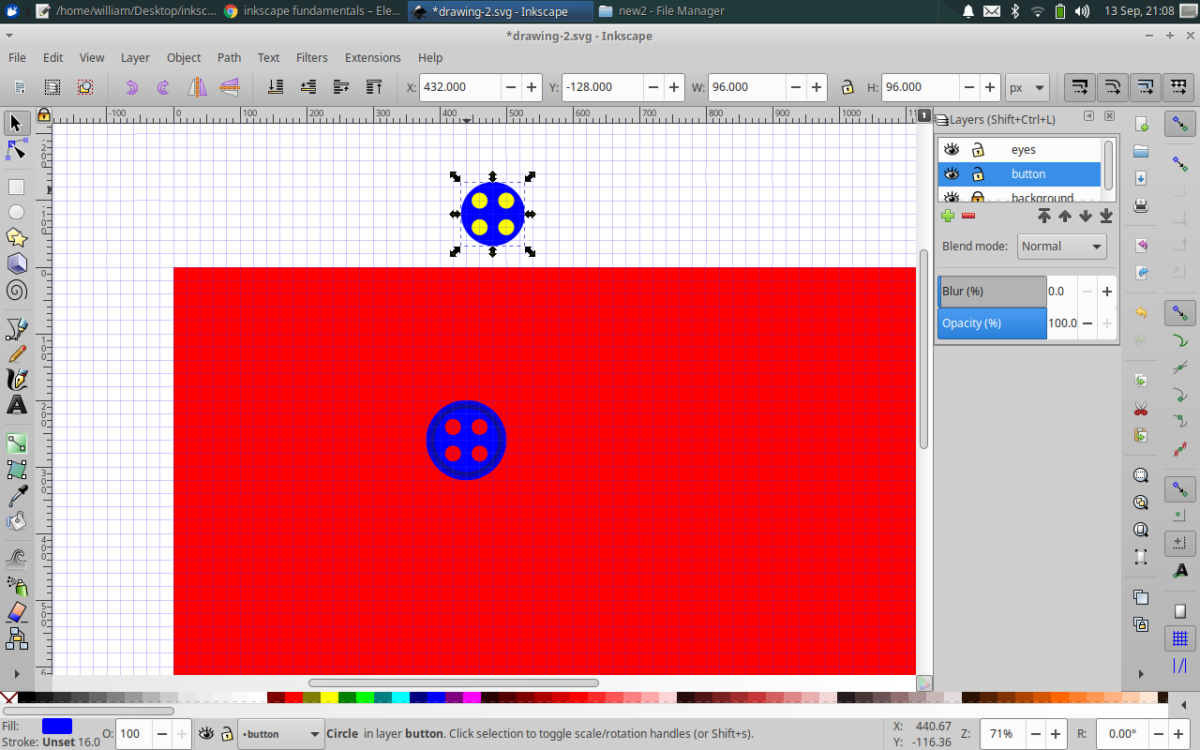
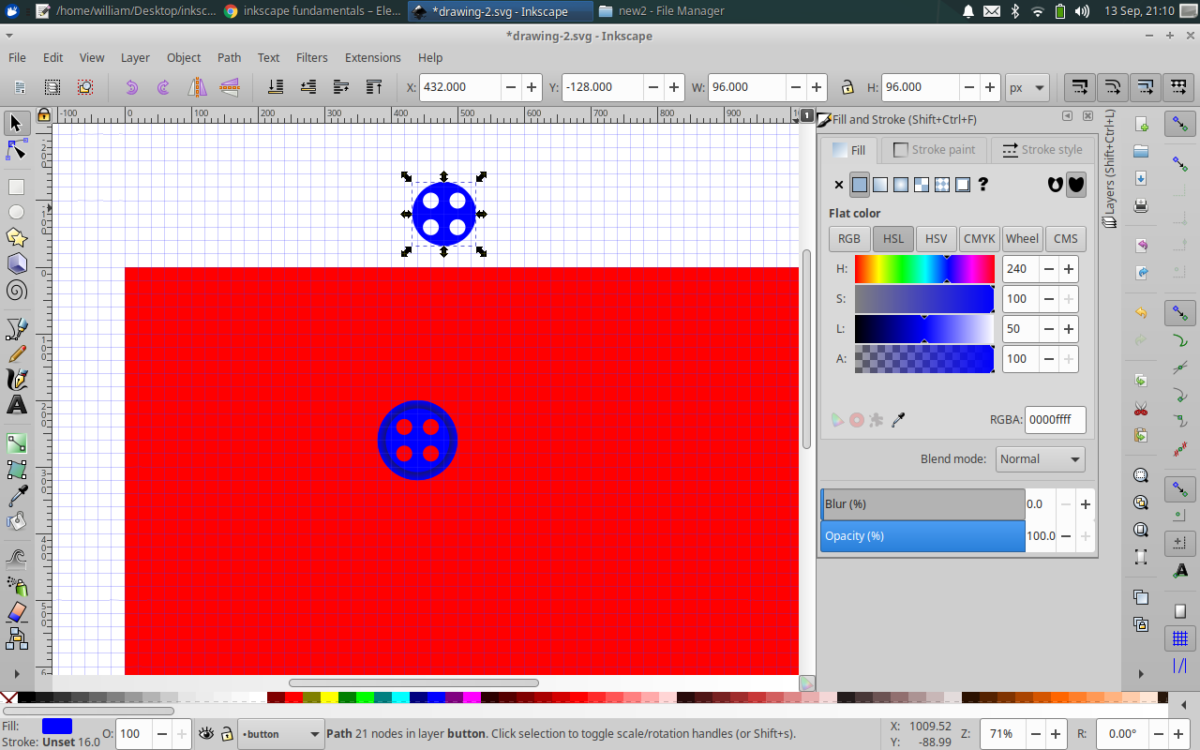
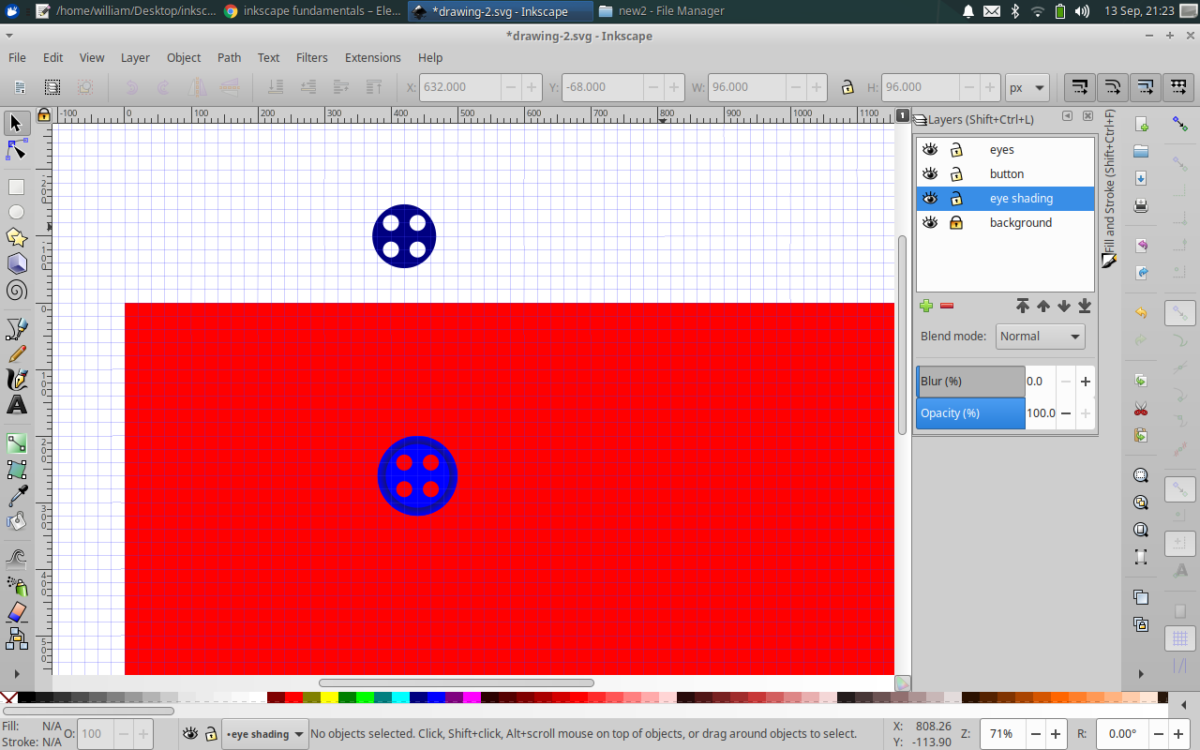 The last step is to use a copy of the “4 circle path” to create a 3-d effect for the button holes.select the copy of 80% scale, it should be blue (#ff0000).cut a “4 circle path” and paste it if you have to to fix the “z-index”, snap it – is snapping enabled? snap to other points(centers, guide origins, gradient handles, etc.)? snap to items rotation center? snap to grids? All those icons need to be selected for the circle/object snapping to function efficiently/properly… drag or paste, depending upon the “z-index”status, over the center of the scaled blue circle. Select the blue circle (by it’s “bounding box”, then the “4 circle path”, and finally do a “difference” path operation.use color palette at bottom of window if you need to change the color. With this circle still selected, open up Object->Fill and Stroke window, select HSL under “flat color”, in the “L” (light) row, drop the number from 50 to 35. This is the shading.Open layer window select “button” layer and add a new layer click “+”, call it “eyes shading”, selecting “Below current” because we want the shaded object under the other objects. Cut the shaded, scaled circle, and paste it to the “eyes shading” layer.notice I did not include the commands or keyboard shortcuts, find them here, copy and paste into memory…
 -
get ready to precisely place the 3d effect
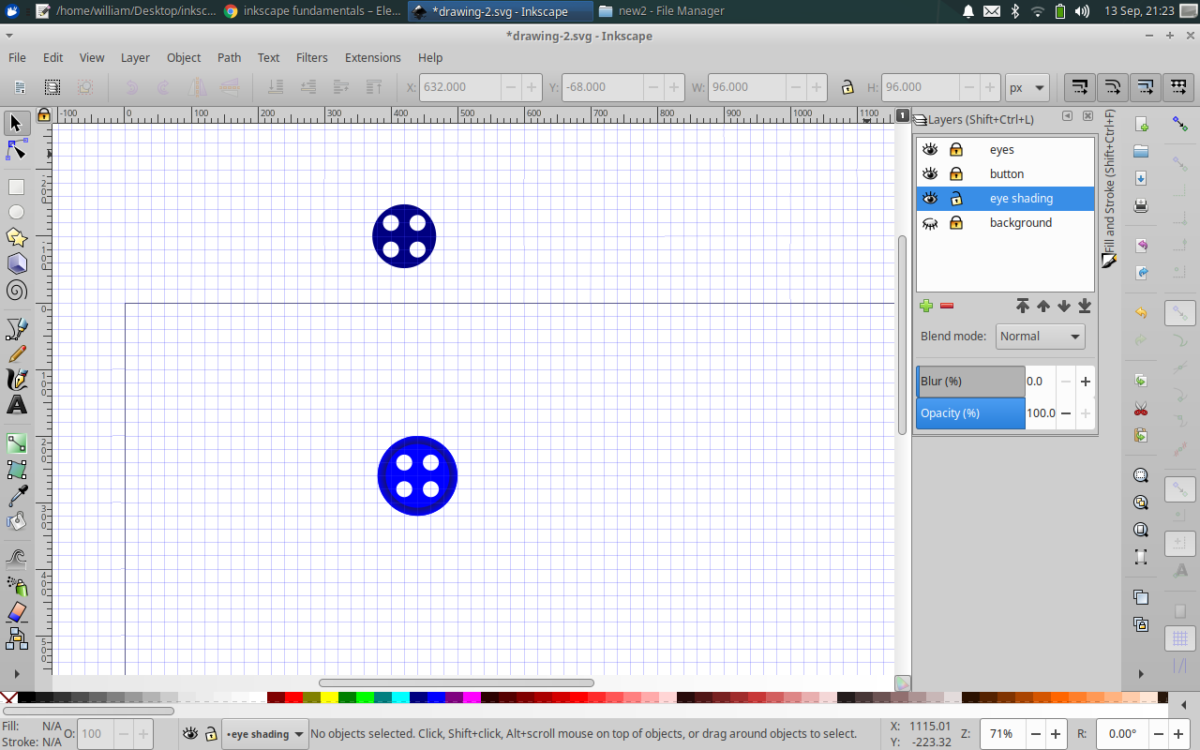 now that you’ve selected all those snapping settings, turn them off :), it’s easy if you just use the very top snapping icon (“enable snapping”) (or key “%”)…
-DESELECT SNAPPING
–LOCK EYES LAYER & BUTTON LAYER
-CLICK EYE CLOSED (hide layer) FOR BACKGROUND(red disappears…) we are done with this layer and keeping it hidden will prevent it from being included when we export to PNG. -
set the 3d effect
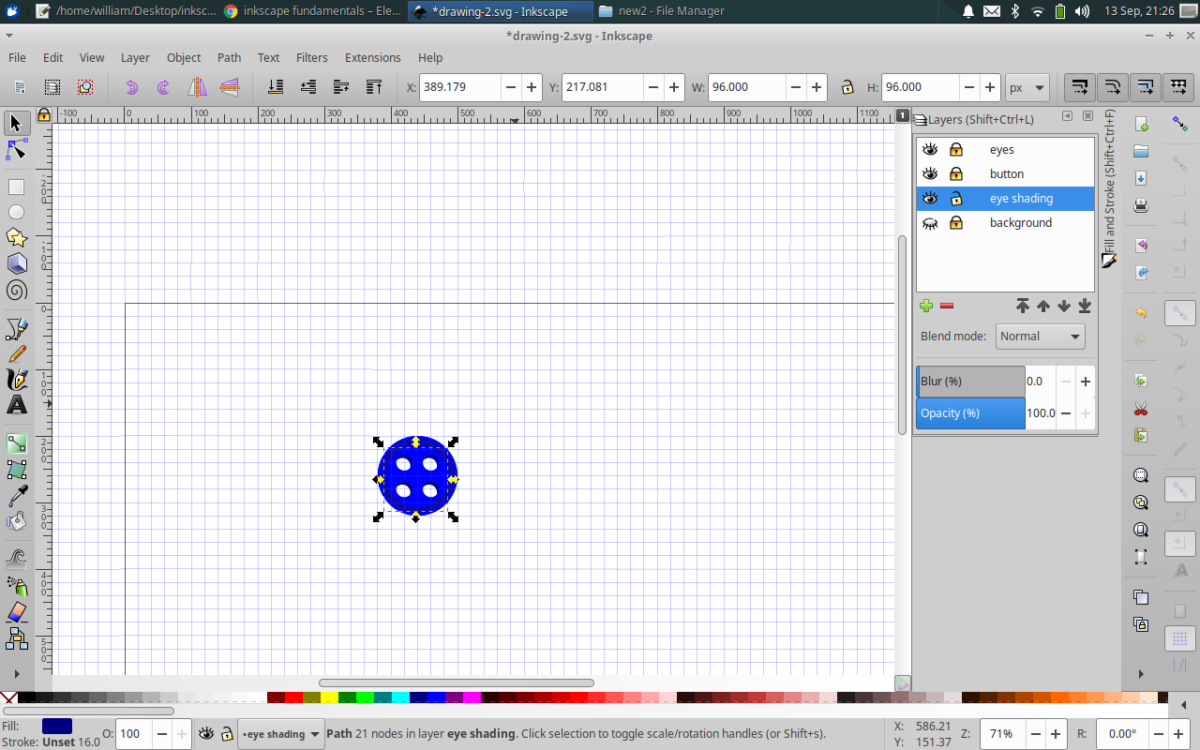 We do all this to move the “4 circle path” with the shading underneath the eyes layer and the button layer, locking those 2 previously mentioned layers will help us adjust the “eyes shading” layer without disturbing the others… deselecting snapping will also help us get this layer exactly where we want it.If you drag the shadhed object in the “eyes shadding” layer under the button, let it go (it’s still selected) and then use the arrow keys for precise adjustments, you should be good!when you’re satisfied, keep the background layer hidden (eye closed), and lock all other layers (closed lock)
 -
resizing the image to the content, exporting your work, victory!
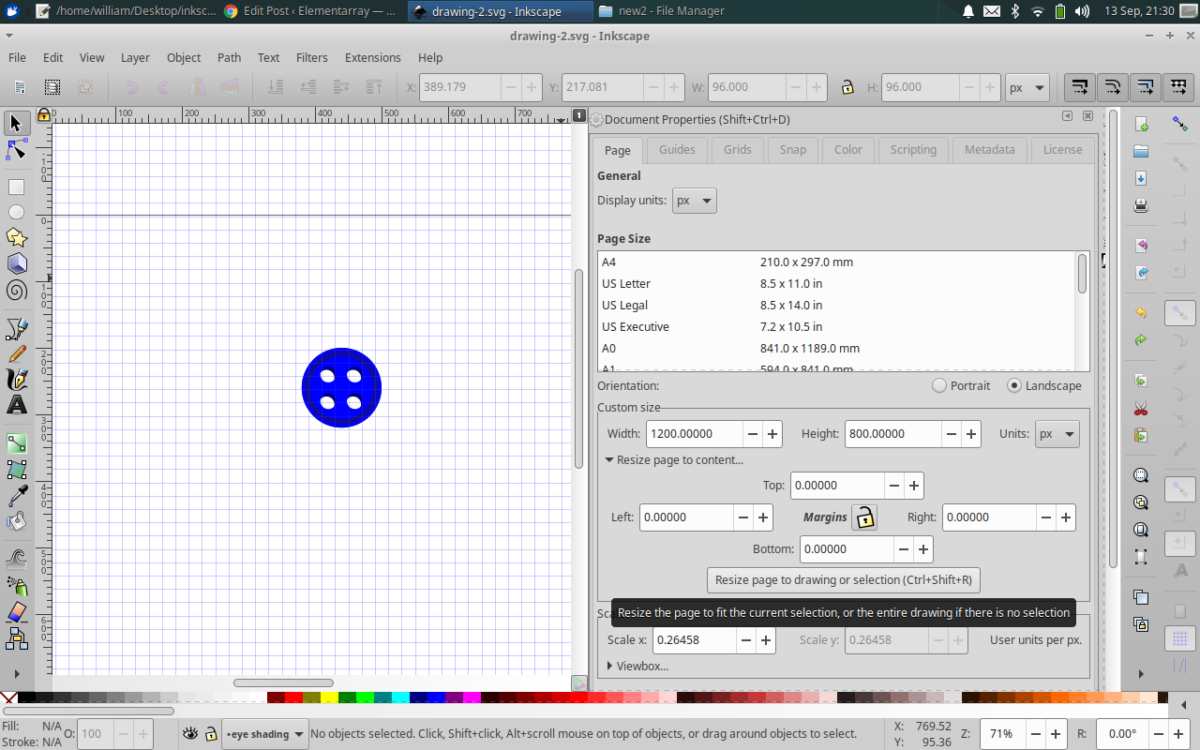
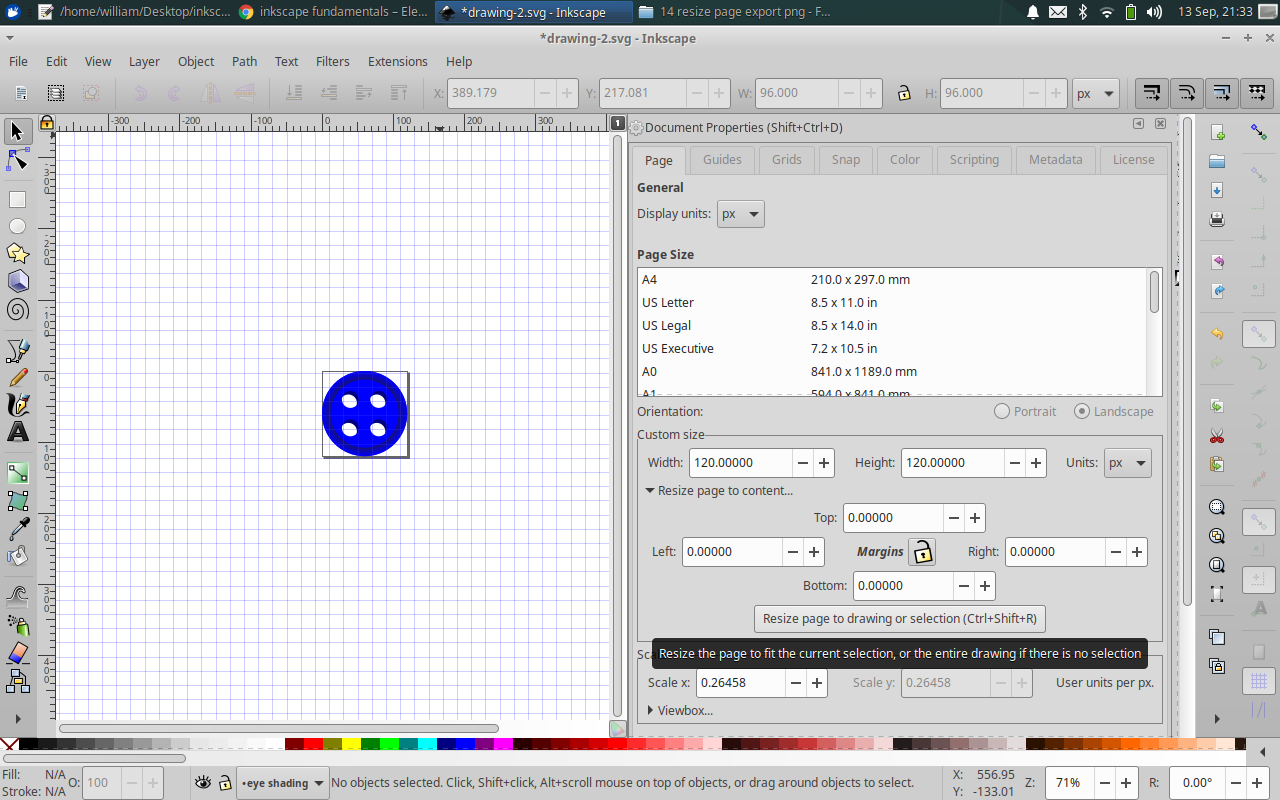
 Make sure #1 nothing is selected and #2 you don’t have any junk outside the page in the “drawing” area.
file->document properties->”resize page to content” drop arrow->”resize page to drawing or selection” button (or key Shift + Ctl + “r”), width and height will change to reveal new size (size of drawing/selection).
file->export png image (or key Shift + Ctl + “e”), make sure “page” button at tab (“export area”) is selected. Don’t forget to give it a place to live so you can find it… “filename” row, where you can give it a directory(that you have permissions too…) and a filename, we called ours “button”, and click export button. I say “that you have permissions too…” because if you don’t it won’t export and you’ll look there and be baffled at the transparency of your file icon ;).
